


My Approach to Designing 3-D Printable Scale-Mail in Autodesk Maya
- Dec 27, 2017
- 5 min read
Earlier in the year, I read an interesting article about a designer who had modeled 3-D printable scales in order to make scale mail, which is a type of armor made up of a large number of interlinked metal scales (in this case, presumably for designing and making costumes). While I thought the design was interesting, I didn’t like that each individual scale had to be linked by hand. So, over the next week, I tried to make a design such that, when printed, each scale would be linked and all the maker would have to do to get the entire sheet of scale mail would be to remove it from the print bed. The following describes my workflow for designing scale mail, and will hopefully show that designing chainmail is surprisingly simple and easy to understand.
This post describes how I designed a hexagonal sheet of scale mail, but the same basic principals used here will work for patterns of lower polygonal complexity (I'll get into that at the end). I used Autodesk Maya (which one can get a free student license for) for the main design and Cura to slice it into a printable file. If you cannot get access to Autodesk Maya, I uploaded my design to Thingiverse here. Access to it should be free, but please feel free to give me feedback on ideas for improvement and/or additional designs.
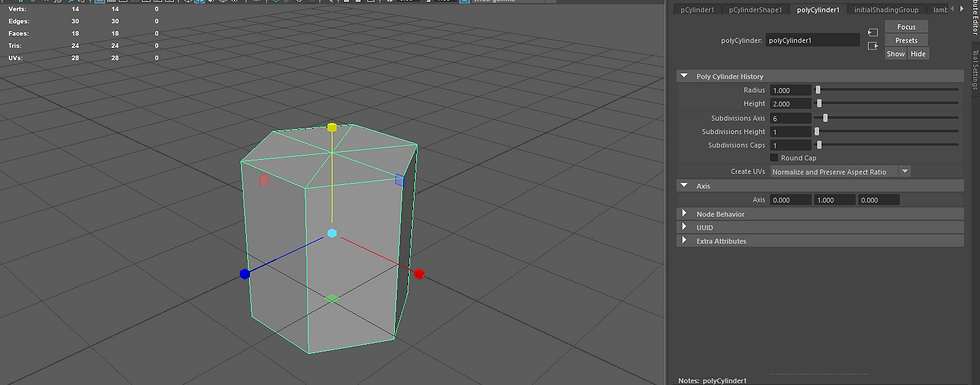
First, create a cylinder with six subdivisions.

Bevel the edges. You can do this by holding the right mouse button on the cylinder and selecting edges, then drag selecting all the edges, and then shift-right-clicking the edges and selecting bevel. I personally used two subdivisions at a 0.2 angle.

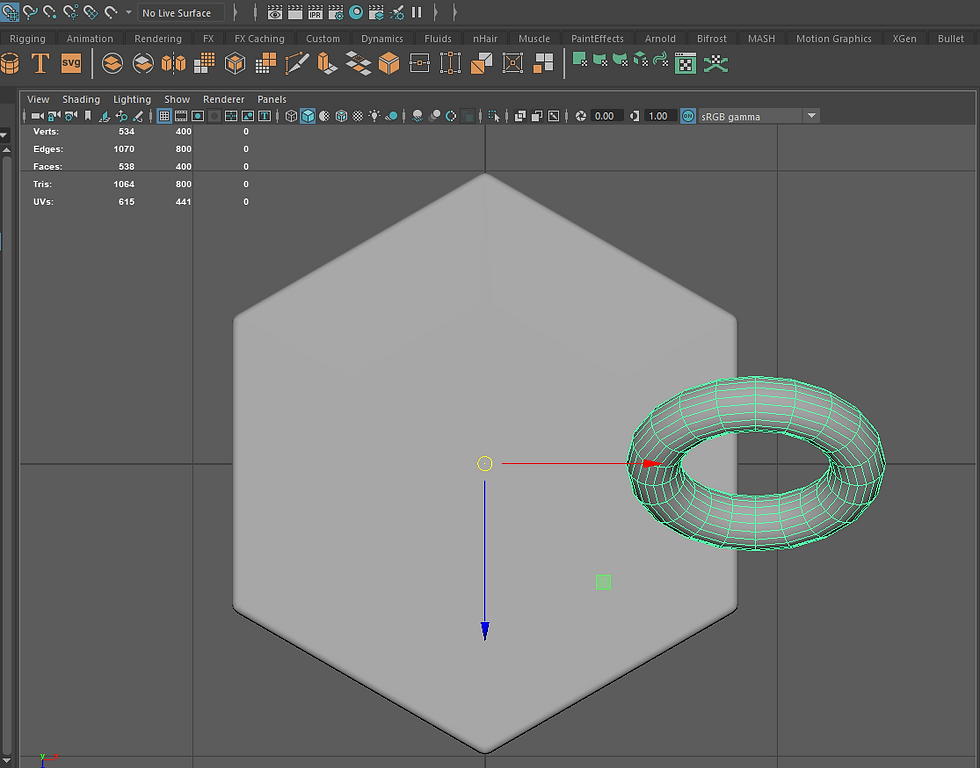
Now create a Torus (a ring). Move it to the outside of your hexagonal cylinder and rotate it slightly (Its angle relative to the ground should still be above 45% to prevent overhang issues when printing). Edit its attributes so that it achieves about the same thickness and size (in relation to the cylinder) as the image shown above. Subdivisions don't particularly matter -- the standard ones should be high enough -- but don't worry about your final design having a high number of polygons. It shouldn't matter much.

At this point, you need to check that your ring will actually fit your design. The easiest way, I found, was as follows: Duplicate your ring by selecting it in object mode and pressing ctrl-D. Rotate it at a 180 degree angle to the first ring by pressing e and j as you rotate it. At this point, you want to move your ring slightly out. Using your orthographic views (which you can access by pressing spacebar) as well as your standard perspective view, check if there is any intersection between the ring and its duplicate. If there is, make the torus thinner and/or change its angle of rotation.
Now you need to change the cylinder's pivot point. You can do this by pressing w and then pressing Insert. While moving the point, make sure you select the option shown above in the top left hand corner, which will snap the movement of the pivot point to the grid. Deselect it afterward. The pivot point does exactly what it implies; it changes the center of the object's rotation. The reason why we do this will be clear in the next step. You also need to rotate the cylinder such that the ring is perpendicular to one of its sides, as shown above. Hold J as you are rotating the shape to ensure that it rotates to exactly the angle you want it to.
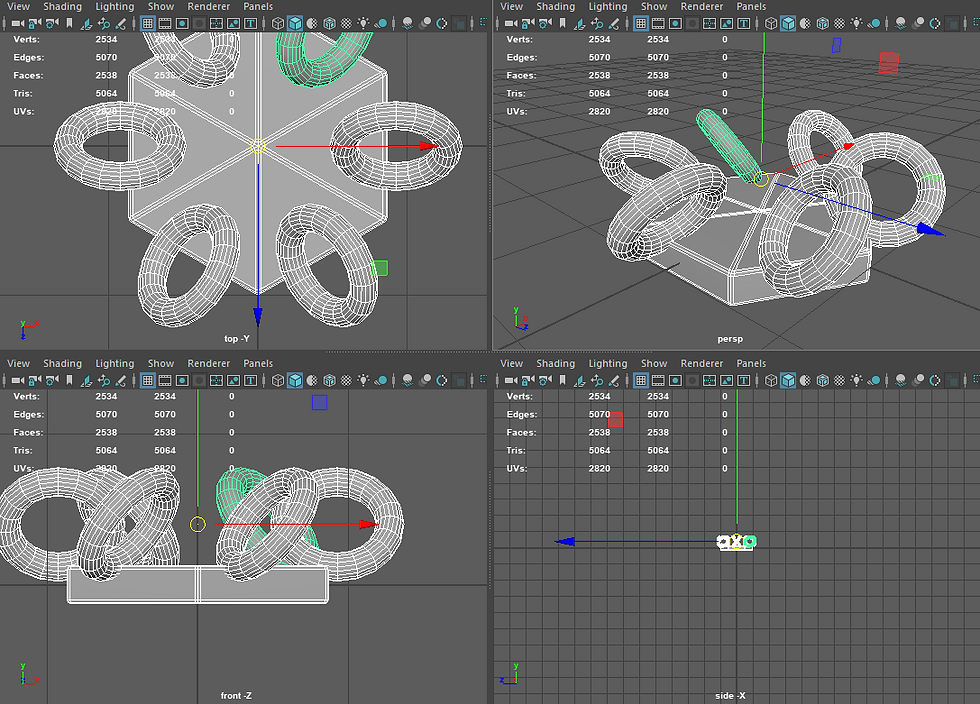
Now you need to duplicate the ring onto each side of the cylinder. Do this by pressing ctrl-D and rotating by pressing e and holding j, and then pressing ctrl-shift-D to repeat the duplication.

At this point, you need to create an inner barrier between the rings -- otherwise, it is likely that they will simply fall apart after they print. To do this, first create a cylinder with about 20 subdivisions and scale it using the r key and move it with the w key.

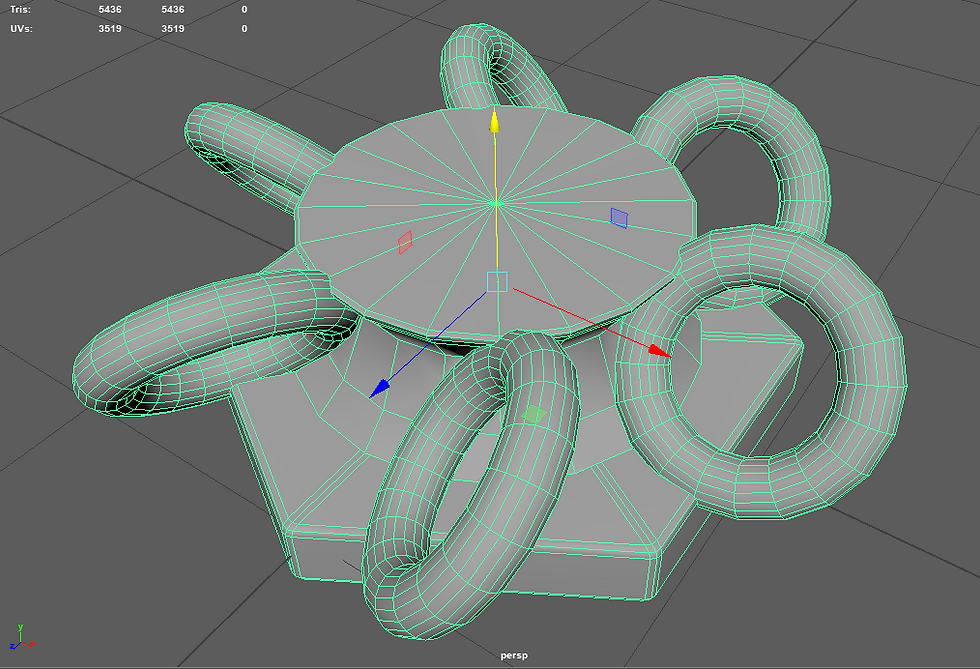
While the placement of the cylinder is satisfactory, we need to actually make sure it supports the rings. We need to edit its mesh. Go to mesh tools, and select the option that allows you to add an edge loop. With the edge loop tool selected, click along the vertical subdivisions of the cylinder in order to add horizontal edge loops, as shown in the image above. Add three edge loops, and make sure the middle one is at the place where the ring comes closest to the cylinder. Scale the rest, selecting them by double clicking on a single edge in the loop and then pressing r to select the scale tool. Then select the top edge loop and press shift-rtclick-bevel to smooth it slightly. Two subdivisions should be enough.
Up to this point, we have had these objects shown as different objects. This will confuse the printer, and may generate problems when printing. To bind all the objects in the scene into one large mesh, select all of them and select mesh => booleans => union.
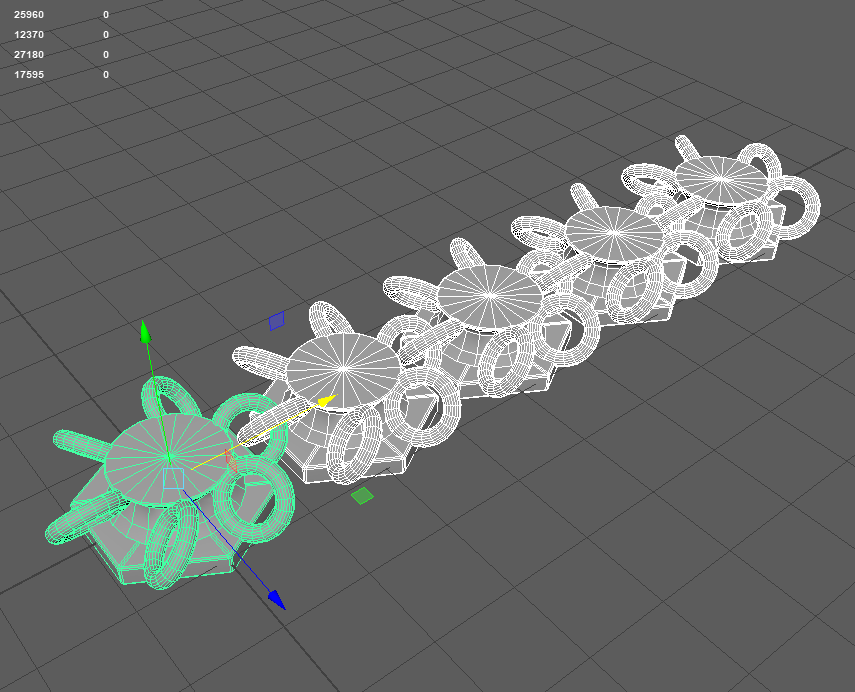
The final task we have to complete is to make the final sheet. To do this, we can simply duplicate the object along a single line (ctrl-D and then shift-ctrl-D). Make sure that each ring prints inside the next, as shown in the image above.

Now we duplicate that row once, and then select the two rows and duplicate them multiple times, forming a pattern. As shown above.
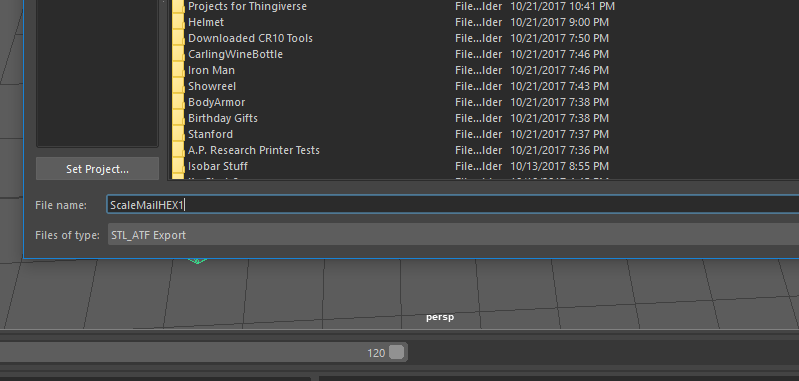
All we have to do now is slice the file into a 3-D printable format. First, we need to export the objects as an STL file, so select them and select file=>export selection, and choose STL as the file type as shown above.

Now import that STL file into Cura, or whatever slicer you're using. Orient it so that the scales are on the bed of the printer. This way, the printer will print the scale mail as a series of objects on flat surfaces. Scale as needed, and adjust the print speeds and whatever else you need to adjust given your printer.
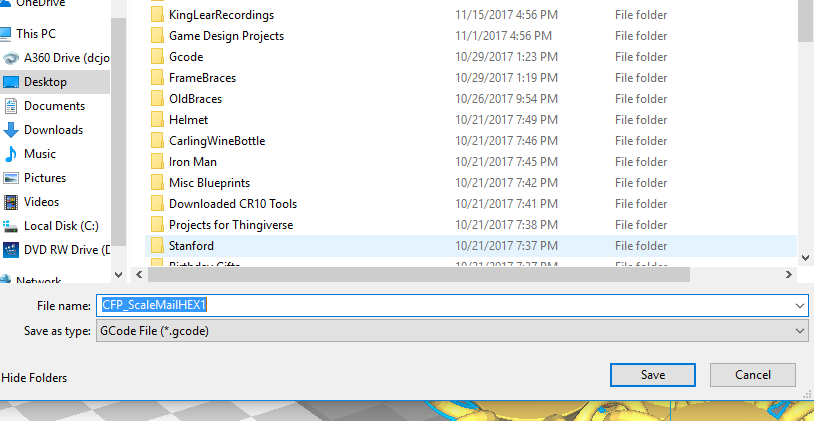
Select "save to file" and choose GCode as the file type. I would recommend that you print the scale mail on a glass bed, rather than on painters' tape or a buildtak surface, so that the scales themselves have a shiny texture on the outside.
This process can essentially be replicated for other types of polygons. For instance, if I wanted to make a quadrilateral scale mail design, I would replicate nearly the same procedure, but using a cylinder with 4 subdivisions and only 3 additional duplications of the outer rings.
Anyway, I hope you enjoyed this! Let me know if there is any confusion about the process, and if you have any additional ideas for improvement of the design.
Comments